If you have a WordPress site that uses a lot of media files, such as images, videos, audio files, or PDF documents, you may run into the problem of using too much disk space on your server. This can affect your site's performance, security, and backup process. One way to solve this problem is to upload your WordPress files to AWS S3, which is an object storage service from Amazon Web Services. AWS S3 offers cheap, scalable, and reliable storage for your files in the cloud.
In this blog post, I will show you how to upload your WordPress files to AWS S3 using an open source plugin called S3 Uploads. This plugin will automatically copy or move your files from your WordPress media library to your AWS S3 bucket. You can also optionally use a CDN (content delivery network) to serve your files faster and more efficiently.
Here are the steps you need to follow:
- Create an AWS account and an S3 bucket
- Install and activate the S3 Uploads plugin
- Configure the plugin settings and connect it to your S3 bucket
- Test the plugin functionality and check your S3 bucket
- (Optional) Use a CDN to serve your files from S3
Let's go through each step in detail.
Step 1: Create an AWS account and an S3 bucket
To use AWS S3, you need to have an AWS account. If you don't have one already, you can sign up for free here: https://aws.amazon.com/free/
Once you have an AWS account, you need to create an S3 bucket. A bucket is a container for your files in AWS S3. You can create as many buckets as you want, but each bucket name must be unique across all AWS accounts.
To create an S3 bucket, follow these steps:
- Log in to your AWS console and go to the S3 service page: https://console.aws.amazon.com/s3/
- Click on the Create bucket button
- Enter a name for your bucket (e.g., wordpress-s3-demo)
- Choose a region for your bucket (e.g., US East (N. Virginia))
- Click on the Create bucket button again
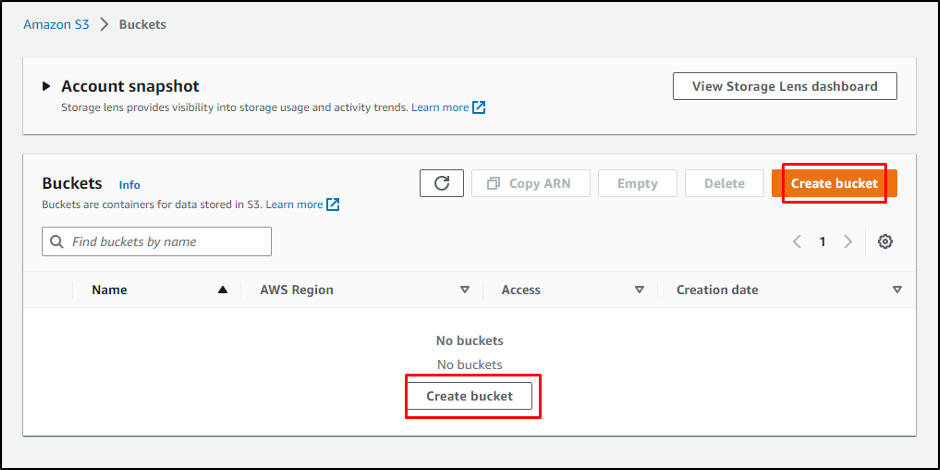
You should see your new bucket in the list of buckets.
Step 2: Install and activate the S3 Uploads plugin
The next step is to install and activate the open source S3 Uploads plugin on your WordPress site. This plugin will handle the uploading of your files to AWS S3.
To install and activate the plugin, follow these steps:
- Go to your WordPress dashboard and navigate to Plugins > Add New
- Search for "S3 Uploads" and click on the Install Now button
- After the installation is complete, click on the Activate button
Alternatively, install the plugin from source here: https://github.com/humanmade/S3-Uploads
You should see a new menu item called "S3 Uploads" under Settings.
Step 3: Configure the plugin settings and connect it to your S3 bucket
The next step is to configure the plugin settings and connect it to your S3 bucket. You will need to provide some information about your AWS account and your S3 bucket.
To configure the plugin settings and connect it to your S3 bucket, follow these steps:
- Go to Settings > S3 Uploads in your WordPress dashboard
- Enter your AWS Access Key ID and Secret Access Key (you can find them in your AWS console under Security Credentials)
- Enter your AWS Region (the same as your bucket region)
- Enter your Bucket Name (the name of the bucket you created in step 1)
- Choose whether you want to copy or move your files from WordPress to S3 (copy means that your files will remain on both WordPress and S3, while move means that your files will be deleted from WordPress after uploading to S3)
- Choose whether you want to enable URL rewriting (this means that your file URLs will be changed from WordPress URLs to S3 URLs)
- Click on the Save Changes button
You should see a message that says "S3 Uploads is enabled".
Step 4: Test the plugin functionality and check your S3 bucket
The next step is to test the plugin functionality and check your S3 bucket. You can do this by uploading a new file or editing an existing file in your WordPress media library.
To test the plugin functionality and check your S3 bucket, follow these steps:
- Go to Media > Add New in your WordPress dashboard
- Upload a new file or select an existing file and click on the Edit button
- Check the file URL and see if it matches your S3 bucket URL (e.g., https://wordpress-s3-demo.s3.amazonaws.com/wp-content/uploads/2023/03/test-image.jpg)
- Go to your AWS console and navigate to your S3 bucket
- Check if the file is uploaded to your S3 bucket under the same path as your WordPress upload directory (e.g., wp-content/uploads/2023/03/test-image.jpg)
If everything works as expected, you have successfully uploaded your WordPress files to AWS S3.
Step 5: (Optional) Use a CDN to serve your files from S3
The last step is optional, but highly recommended. You can use a CDN (content delivery network) to serve your files from S3 faster and more efficiently. You will also save significant money on bandwidth costs depending on your S# usage. A CDN is a network of servers that are distributed around the world and can deliver your files to your visitors from the closest location.
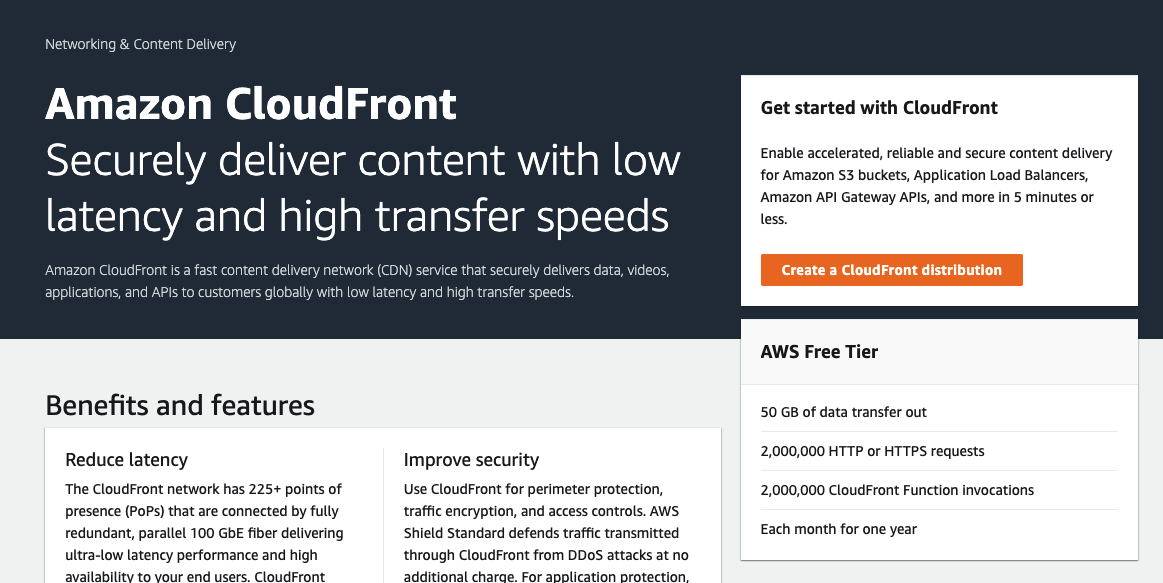
There are many CDN services that you can use with AWS S3, such as Cloudflare, CloudFront, or KeyCDN. For this tutorial, I will use CloudFront, which is a CDN service from Amazon Web Services.
To use CloudFront with AWS S3, follow these steps:
- Go to your AWS console and navigate to the CloudFront service page: https://console.aws.amazon.com/cloudfront/
- Click on the Create Distribution button
- Choose Web as the delivery method and click on the Get Started button
- Under Origin Domain Name, select your S3 bucket from the dropdown menu
- Under Origin Path, enter the path to your WordPress upload directory (e.g., /wp-content/uploads)
- Under Default Root Object, enter index.html
- Under Viewer Protocol Policy, choose Redirect HTTP to HTTPS
- Under Allowed HTTP Methods, choose GET, HEAD, OPTIONS, PUT, POST, PATCH, DELETE
- Under Compress Objects Automatically, choose Yes
- Under Cache Based on Selected Request Headers, choose Whitelist
- Under Whitelist Headers, add Host and Origin
- Under Distribution Settings, enter a name for your distribution (e.g., wordpress-s3-demo)
- Click on the Create Distribution button
It may take some time for your distribution to be deployed. You can check the status on the CloudFront dashboard.
Once your distribution is deployed, you will see a domain name for your distribution (e.g., d1234567890.cloudfront.net). This is the URL that you will use to serve your files from S3.
To use this URL with the S3 Uploads plugin, follow these steps:
- Go to Settings > S3 Uploads in your WordPress dashboard
- Enter your CloudFront domain name in the Custom Domain field (e.g., d1234567890.cloudfront.net)
- Click on the Save Changes button
You should see a message that says "S3 Uploads is enabled".
Now, when you upload or edit a file in your WordPress media library, you will see that the file URL is changed to use your CloudFront domain name (e.g., https://d1234567890.cloudfront.net/wp-content/uploads/2023/03/test-image.jpg).
This means that your files are served from CloudFront instead of S3 directly. This will improve your site's speed and performance.
Conclusion
In this blog post, I have shown you how to upload your WordPress files to AWS S3 and save disk space on your server. I have also shown you how to use a CDN to serve your files faster and more efficiently.
By using AWS S3 and CloudFront with WordPress, you can enjoy the benefits of cheap, scalable, and reliable storage for your files in the cloud.
I hope you found this blog post helpful and informative. If you have any questions or feedback, please leave a comment below.